Violin fingering charts
These first-position charts show the notes on G, D, A and E, plus one-octave scales in G, D and A major. Print the PDF for your music stand or download a chart below.
How to read the charts
0 means an open string. Fingers 1, 2, 3 and 4 are your index, middle, ring and little finger. The nut is at the top of each diagram; moving toward the bridge raises the pitch. Adjacent horizontal rows represent one semitone, not equal physical distances. A low finger moves toward the nut; a high finger moves toward the bridge.
Notes include octave numbers: open strings are G3, D4, A4 and E5. A # means sharp. The equivalent flat name can refer to the same equal-tempered pitch: A# is Bb, C# is Db, D# is Eb, F# is Gb and G# is Ab. The score’s key and spelling determine which name to use.
Finger spacing gets smaller as you move up the string. The diagrams aren’t drawn to scale, so don’t use them to measure fingerboard tape.
Start with tuned open strings
New to note names? Read the violin notes guide for open strings on the staff and a first-position reference.
Use our violin tuner to check G, D, A and E before practicing. This tuner checks open strings. For fingered notes, use a chromatic tuner or ask your teacher to check your intonation.
G string: first-position notes
G3 is the lowest open string. Fingers 1, 2 and 3 give A3, B3 and C4. Finger 4 plays D4, the same note as the open D string. A low second finger gives A#3, also written Bb3.
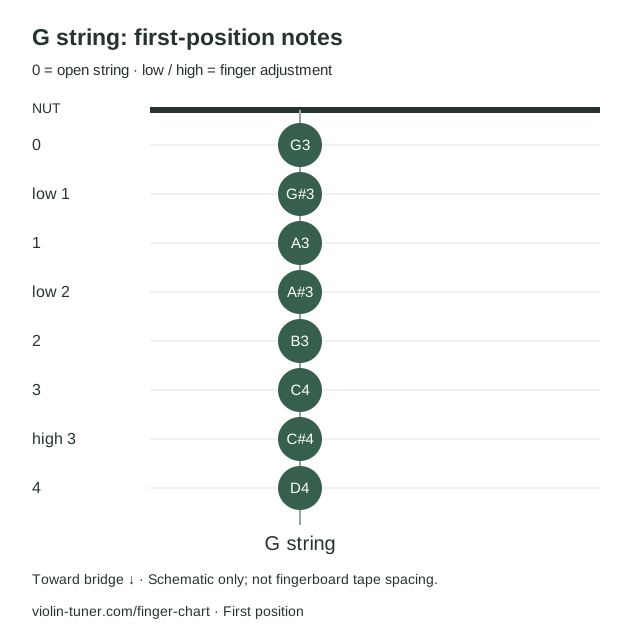
| String | Finger | Note |
|---|---|---|
| G | 0 | G3 |
| G | low 1 | G#3 |
| G | 1 | A3 |
| G | low 2 | A#3 |
| G | 2 | B3 |
| G | 3 | C4 |
| G | high 3 | C#4 |
| G | 4 | D4 |
D string: first-position notes
On the D string, finger 1 plays E4. A low second finger gives F4; the usual second-finger position gives F#4. Finger 3 plays G4, and finger 4 plays A4, matching the open A string.
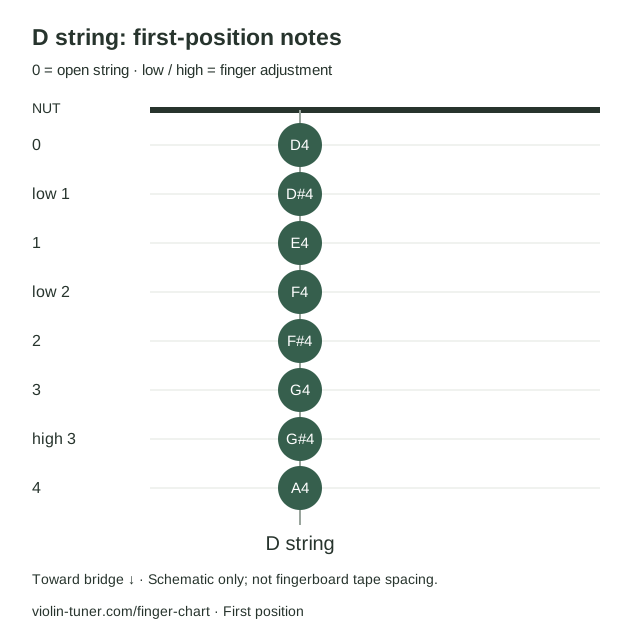
| String | Finger | Note |
|---|---|---|
| D | 0 | D4 |
| D | low 1 | D#4 |
| D | 1 | E4 |
| D | low 2 | F4 |
| D | 2 | F#4 |
| D | 3 | G4 |
| D | high 3 | G#4 |
| D | 4 | A4 |
A string: first-position notes
Start with open A4. Finger 1 plays B4. Move finger 2 closer to finger 1 for C5, or leave a whole step for C#5. Finger 3 plays D5; finger 4 plays E5, matching the open E string.
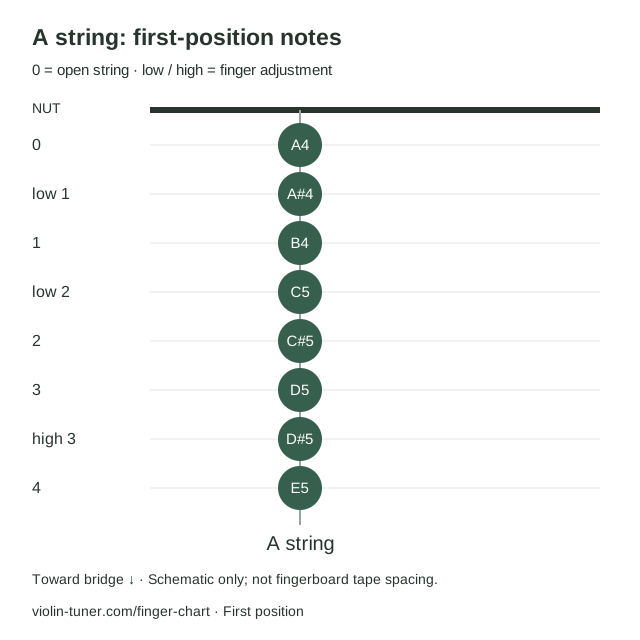
| String | Finger | Note |
|---|---|---|
| A | 0 | A4 |
| A | low 1 | A#4 |
| A | 1 | B4 |
| A | low 2 | C5 |
| A | 2 | C#5 |
| A | 3 | D5 |
| A | high 3 | D#5 |
| A | 4 | E5 |
E string: first-position notes
On the E string, a low first finger gives F5 and the usual first-finger position gives F#5. Finger 2 plays G#5, or G5 when lowered. Finger 3 gives A5 and finger 4 gives B5.
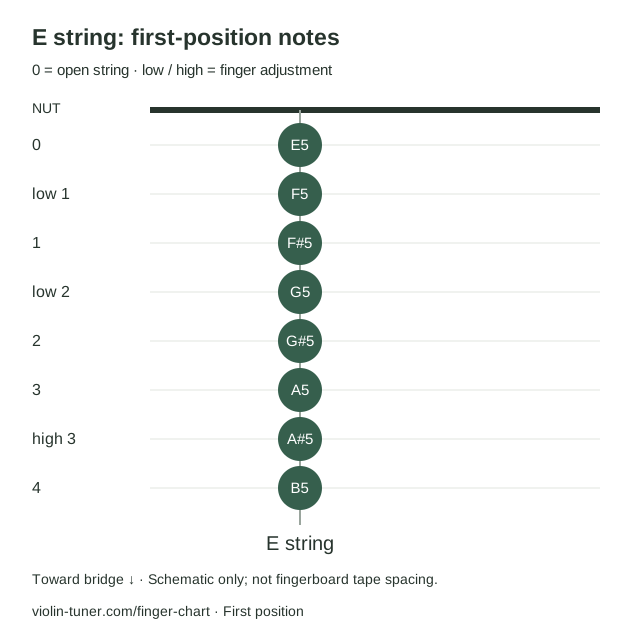
| String | Finger | Note |
|---|---|---|
| E | 0 | E5 |
| E | low 1 | F5 |
| E | 1 | F#5 |
| E | low 2 | G5 |
| E | 2 | G#5 |
| E | 3 | A5 |
| E | high 3 | A#5 |
| E | 4 | B5 |
G major: one-octave practice
Play G3, A3, B3, C4, D4, then E4, F#4, G4. Use fingers 0-1-2-3-4 on the G string, then 1-2-3 on the D string. Play the scale back down slowly.
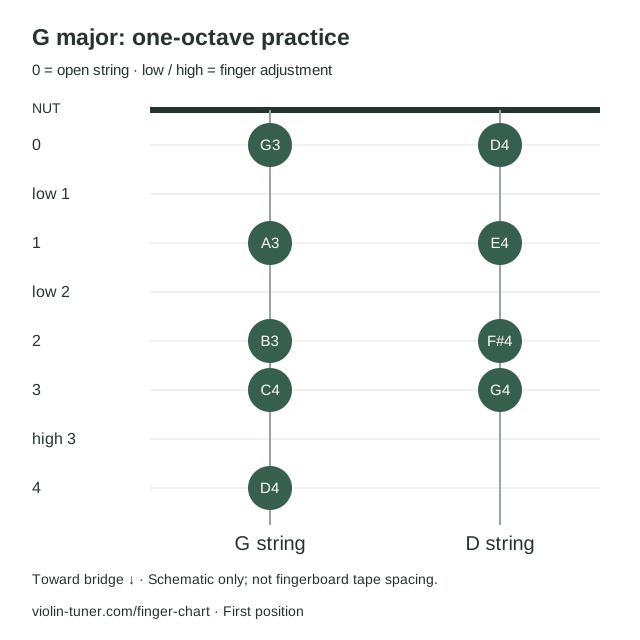
| String | Finger | Note |
|---|---|---|
| G | 0 | G3 |
| G | 1 | A3 |
| G | 2 | B3 |
| G | 3 | C4 |
| G | 4 | D4 |
| D | 0 | D4 |
| D | 1 | E4 |
| D | 2 | F#4 |
| D | 3 | G4 |
D major: one-octave practice
Play D4, E4, F#4, G4, A4, then B4, C#5, D5. Use fingers 0-1-2-3-4 on the D string, then 1-2-3 on the A string. Play the scale back down slowly.
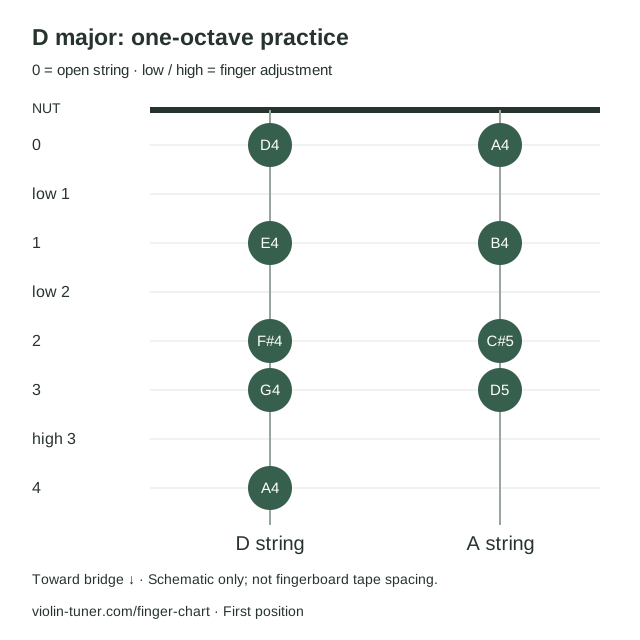
| String | Finger | Note |
|---|---|---|
| D | 0 | D4 |
| D | 1 | E4 |
| D | 2 | F#4 |
| D | 3 | G4 |
| D | 4 | A4 |
| A | 0 | A4 |
| A | 1 | B4 |
| A | 2 | C#5 |
| A | 3 | D5 |
A major: one-octave practice
Play A4, B4, C#5, D5, E5, then F#5, G#5, A5. Use fingers 0-1-2-3-4 on the A string, then 1-2-3 on the E string. Play the scale back down slowly.
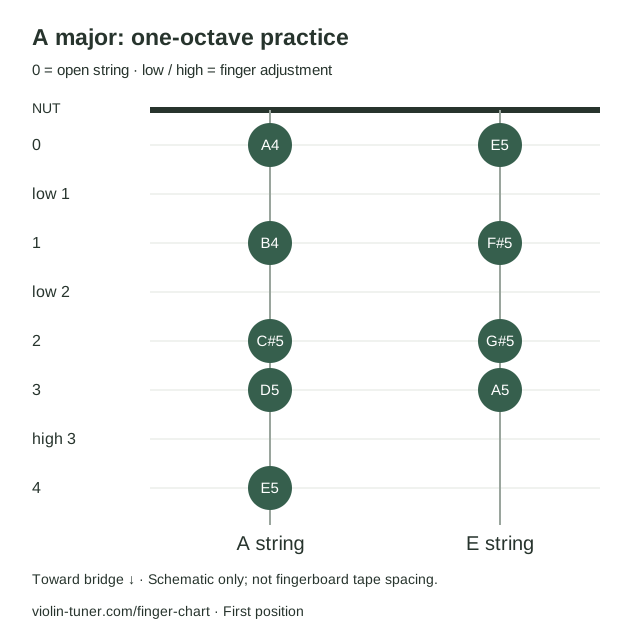
| String | Finger | Note |
|---|---|---|
| A | 0 | A4 |
| A | 1 | B4 |
| A | 2 | C#5 |
| A | 3 | D5 |
| A | 4 | E5 |
| E | 0 | E5 |
| E | 1 | F#5 |
| E | 2 | G#5 |
| E | 3 | A5 |
A short practice routine
- Tune the four open strings before you start.
- Choose one chart and say each note before playing it.
- Play slowly without vibrato. Listen to the interval between adjacent notes.
- Compare a fourth finger with the next open string when they share a pitch.
- Repeat descending, keeping the hand relaxed. Ask your teacher about persistent tension or intonation problems.
Common questions
Does a finger always play the same note?
No. The note depends on the string, hand position and whether the finger is low or high. These charts cover first position only.
Are the charts suitable for every violin size?
The note relationships are the same on standard G-D-A-E violins, but physical distances differ. Do not measure tape locations from these diagrams.
Can I print or share the PDF?
Yes, for personal practice and classroom teaching, keeping the source credit. See the chart permission in our terms.
Sources and corrections
For more on finger numbering and first position, see Yamaha’s violin fingering guide. Found a mistake in a chart? Let me know.
Updated October 3, 2026.